

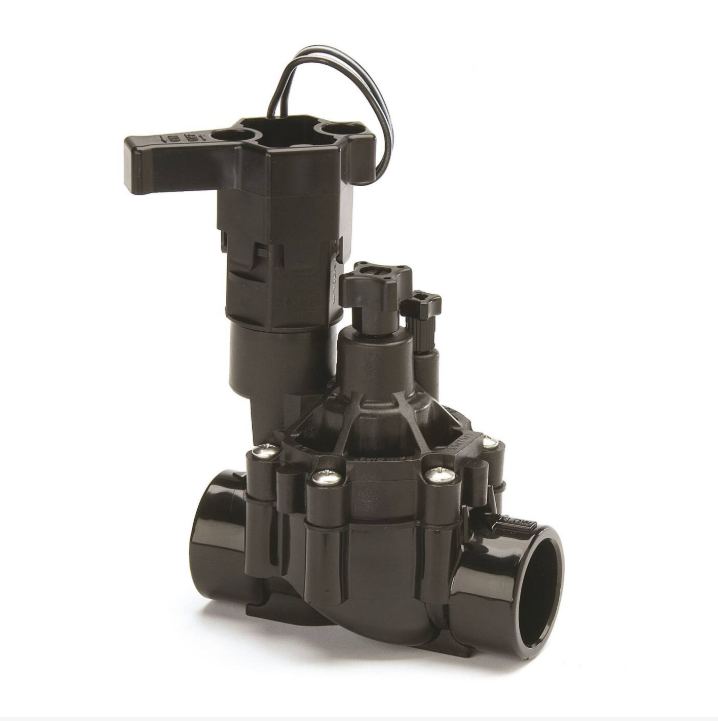
The solenoid valve is the automatic valve in your irrigation system, and you need one for each zone. It takes its instructions from the controller, opens the water for the set time, then shuts it off again. Choosing the right one means watering that starts and stops exactly as planned.
How does a solenoid valve work?
The controller sends an electrical signal to the solenoid, the small coil fitted on top of the valve. The solenoid releases the diaphragm: water flows to the zone concerned (sprinklers, drip irrigation, etc.). When the signal stops, the valve closes.
24 V AC or latching (pulse) solenoid?
This is the key point: the valve must match your controller.
- 24 V AC: for mains-powered controllers, such as the Rain Bird ESP-TM2, the ESP-ME3, the Hunter X2 or the Solem BL-IS.
- 9 V DC latching (pulse): for battery-powered controllers. A brief pulse is all it takes to open or close the valve, which saves the batteries.
Choosing your valve in our shop
1-inch valves, 24 V AC
- Hunter PGV-100G-B 24 V AC: globe-type valve with a screw-on bonnet and a wide flow range.
- Rain Bird 100-DV: 1″ BSP female connections, flow rate from 0.24 to 9.0 m³/h, operating pressure from 1 to 10.4 bar, double filtration, PVC body and external manual bleed.
- Rain Bird 100-DVF female: same basic design, with built-in flow control so you can fine-tune a zone.
- Rain Bird 100-HV 24 V: 24 V AC solenoid, for residential and professional irrigation.
High flow rates, 2 inches
- Hunter PGV-201: 2″ female thread, flow adjustment, 24 V AC solenoid.
- Rain Bird 200-PGA 9 V: 2″ BSP with flow adjustment and a 9 V latching solenoid for battery-powered controllers.
For battery-powered controllers
- Hunter PGV-100G-B DC latching: 1″ female, flow rate from 0.05 to 9 m³/h, pressure from 1.5 to 10 bar, screw-on bonnet for tool-free maintenance.
- Rain Bird K80920 latching solenoid: converts a Rain Bird DV, JTV, PGA, PEB or BPE series valve to battery operation. It works with TBOS, TBOS-II, TBOS-BT, ESP-9V and WPX battery-powered controllers. For a ready-to-go start with nothing to assemble, the Rain Bird ESP-9V kit with DVF valve combines the controller and the valve.
The Rain Bird ESP-BAT-BT Bluetooth controllers, on the other hand, use the TBOSPSOL solenoid listed on their product page: always check compatibility before ordering.
Installing a solenoid valve in 6 steps
These steps follow the installation instructions for Rain Bird DV valves.
- Prepare the site. Turn off the water supply and plan for the valve to sit in an accessible valve box, with adaptors that suit your pipe.
- Fit the adaptors. Wrap two turns of PTFE tape around each adaptor and screw it into the valve port, hand-tight.
- Follow the water flow direction. An arrow moulded into the valve shows the direction of flow.
- Connect the pipework according to the type of pipe you are using.
- Wire the solenoid. One wire goes to the common wire, the other to the controller’s station wire. Use waterproof connectors.
- Flush and test. Loosen the external bleed screw by just one turn (it is not captive) to flush the valve before first use, close it again, then start the zone from the controller.
Having trouble? Simple first steps
- The valve will not close fully: flush it using the external bleed screw, then check that the solenoid and the bleed screw are tight.
- The valve will not open: check the wiring, then open the bleed screw to check that water is actually reaching the valve.
- A leak at the connections: redo the PTFE tape on the adaptors.
Before winter, drain the system to protect the valves from frost.
Not sure which model to pick? Email info@arrosagepro.com with your controller and the number of zones. You will find all our valves in the Solenoid valves and fittings category.
Official sources: Rain Bird DV/DVF valve installation instructions (PDF, with French version)